Auto-Align Post in Adobe Premiere
Learn how to align multiple microphones in Adobe Premiere Pro with Auto-Align Post.
Auto-Align Post
How to use Auto-Align® Post in Adobe Premiere Pro
Learn how to align multiple microphones in Adobe Premiere Pro with Auto-Align Post.
Get familiar with the easy-to-use extension interface and how to create award-winning dialogue.
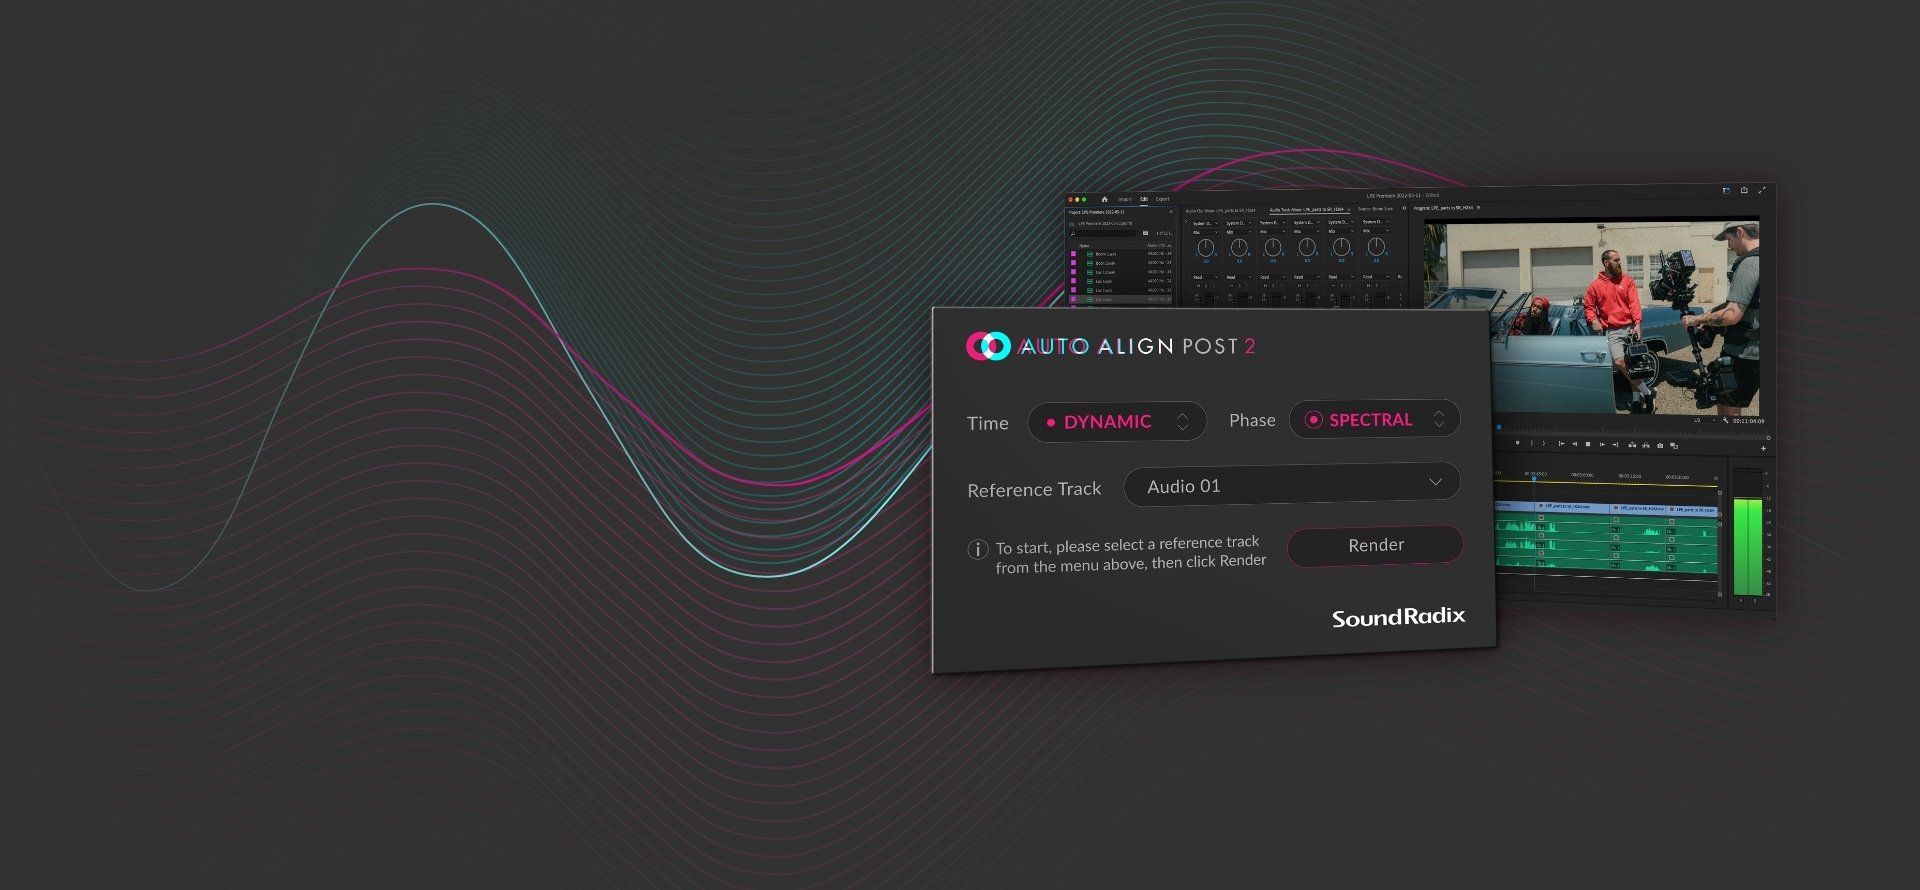
Enabling dynamic time-alignment correction of moving location microphones, Auto-Align® Post makes it possible to effectively mix the boom and lav microphones by eliminating comb-filtering and phase artifacts caused by the time-of-arrival differences, with just a few clicks
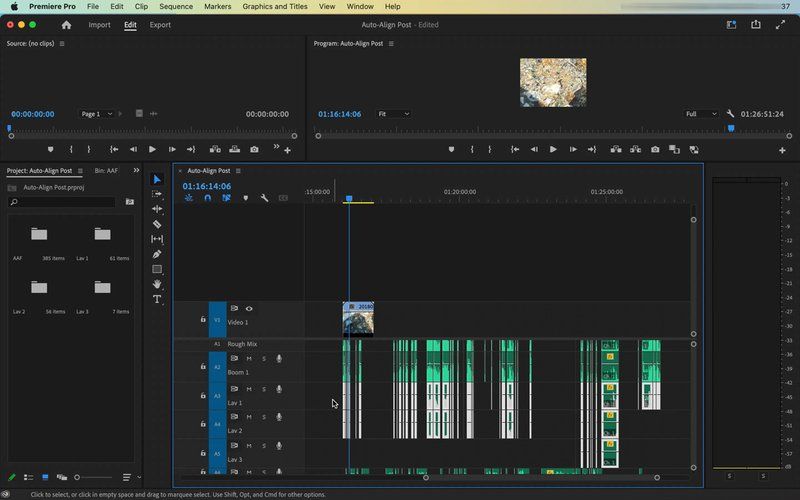
1. Select the audio clips you would like to align.
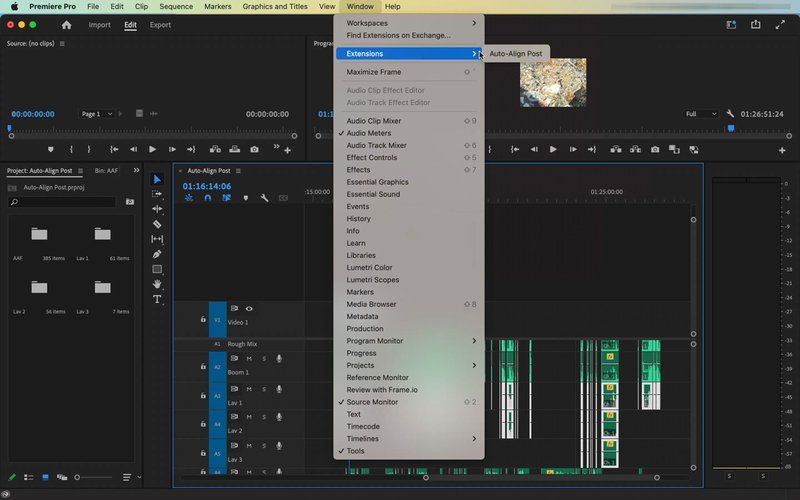
2. Go to the Window menu extensions and select Auto-Align Post.
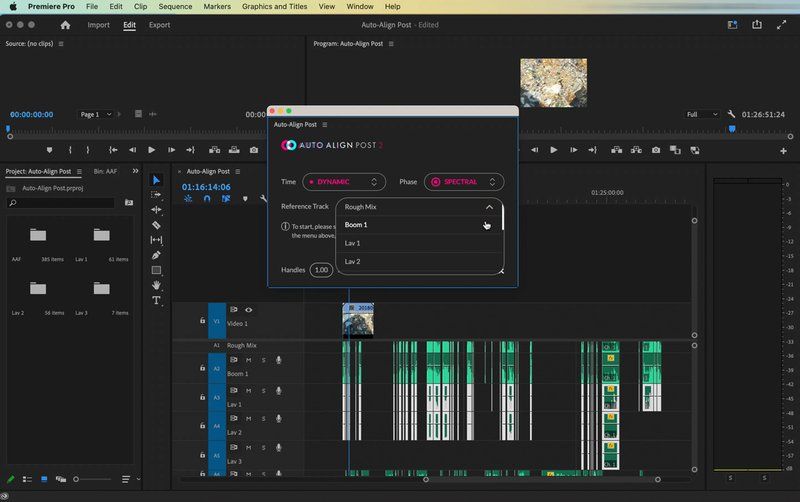
3. In the reference track selector choose the reference track. Usually, that would be the boom mic.
4. Click render.

To align a bit of extra audio outside of the clip’s range increase the length of the handles. We recommend making a copy of your sequence before alignment, just in case the unprocessed clips are needed.
Happy Alignment!