
Mixing dialogue in audio storytelling
Rob Byers of Vox Media shares his dialogue mixing approach. Learn how tools like POWAIR help shape natural sound and elevate storytelling.
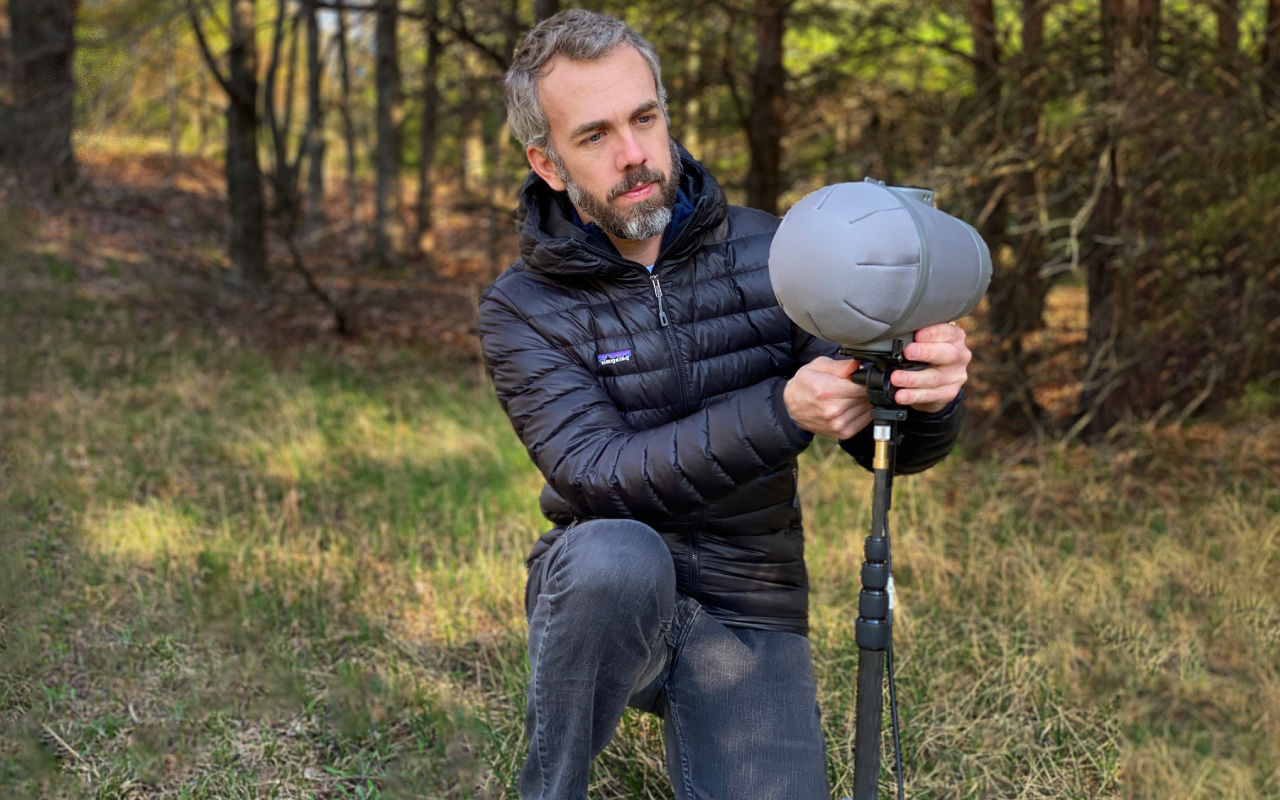
Rob Byers is a Technical Director with Vox Media and has worked with broadcasters and podcast producers including NPR, American Public Media, Criminal, and Fiasco. He previously led audio production training for NPR and trained audio producers across the United States. Rob has recorded musicians from a variety of genres from Lizzo to Yo-Yo Ma, coordinated international broadcasts, and produced major features from the field. Rob was a co-author of the recent loudness recommendation from the Audio Engineering Society, TD1008: Recommendations for Loudness of Internet Audio Streaming and On-Demand Distribution.
We asked Rob to share his approach to dialogue mixing for audio storytelling.
I work in audio storytelling, which always involves dialogue in one form or another. Over the years, I’ve found an approach to mixing dialogue that works well for long-form radio and podcast production. I don’t think this approach is anything earth-shattering — but it’s a process that is good for me. If you find yourself working in similar situations to the ones outlined below, I hope these suggestions can benefit you, too!
Two goals
My primary goal in mixing audio stories is to ensure that dialogue sounds natural and consistent. To my ear, natural-sounding dialogue is free of distractions (e.g., plosives, digital artifacts, background noises), it has a natural tonal shape across the frequency spectrum, and it is dynamic in a way that allows the listener to hear the emphasis of syllables and words. That said, it can’t be so dynamic that low-level speech is masked by competing sounds from the listener’s environment. (Dear listener, I want you to be able to enjoy the content and do the dishes at the same time!)
I have a secondary goal, too: efficiency. Though every production I work on involves dialogue, there are other elements in the mix that also deserve attention. Scene sound, effects, room tone, and music are all important to storytelling. The dialogue work should not take up so much time that the other elements get short-changed. This is where working efficiently becomes important — especially when you factor in other business concerns that also can’t take a back seat, like meetings, planning, and keeping up with a steady stream of emails and Slack messages.
How to be efficient: compartmentalize
I do my most efficient mixing when I break the process down into pieces: aka compartmentalize. When I work on one thing at a time it helps me to focus and avoid being pulled down distracting rabbit holes. I separate the work into categories (such as: reducing broadband noise, EQing and compressing, leveling, balancing music, and so on). Each involves a slightly different set of tools and way of thinking, so I like to focus on one category at a time.
For example, when I sit down to ride levels on a dialogue track, that’s the only thing I will do. If I notice an issue that needs to be addressed (e.g., a plosive pops out or I notice a digital artifact), instead of stopping to address it, I make note of the spot and come back to it later. This keeps me from having to switch back and forth between different tools and keeps me in the same headspace until the task (in this case riding dialogue levels) is done.
Compartmentalizing in this way is a very personal approach, and by no means the best way — but it works well for me and it boosts my efficiency which enables me to move through all the steps of the process with energy and good attention. More examples are coming your way later in this article.
Which loudness target?
Regardless of the distribution loudness used for the published mix (or the final distribution method — podcast or radio), I will target dialogue (and thus the mix) to -24 LUFS and in a later step use a loudness normalization tool to bring the published file to the correct distribution loudness. In other words, if the files are to be published at -18 LUFS integrated, I will mix at -24 LUFS and then, as a final step, loudness normalize the mixdown to -18 LUFS.
There are many advantages to mixing at -24 LUFS. I like that it allows me to mix with more headroom. Over time I have developed an ear for what will be problematic later when a limiter is applied during loudness normalization (i.e., quick transients, unruly music library tracks, or asymmetric waveforms). It’s also great because I subscribe to the belief that you should always keep an archival copy of every project that maintains the full dynamic range of the project. This is useful when a project is repurposed and requires a different integrated loudness. You probably consider full-resolution files appropriate for archiving — why not also archive files with fully-intact dynamics?
Steps for mixing dialogue
Most producers on the narrative storytelling side of the radio and podcast industries are editing Jedis. They have a solid grasp of how pacing and other editing choices will impact the story. When I receive a session, the timeline is usually already put together (meaning all of the voices, scene sound, and most of the music are already in place chronologically). It’s common for parts of this to be revised during the mixing process, but the bulk of it will be complete when I step in. At this stage, levels are rough, and no EQ, detailed volume automation, nor dynamics processing of any kind has been applied.
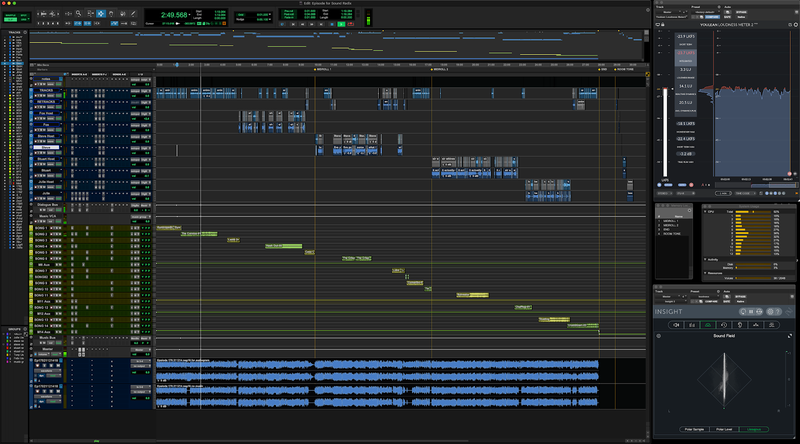
Here’s what a typical episode timeline looks like after I’ve imported my mixing template. In this image, the dialogue tracks are all shades of blue at the top of the session and the music tracks are yellow and green at the bottom.
Step one: loudness
My first step is to ensure that all of the dialogue tracks are hitting close to -24 LUFS without any processing applied. The output gain of a compressor is a great place to make these rough adjustments and I keep the track level automation at unity (I will write automation later). This ensures I can make consistent judgments about EQ, background noise, and compression and won’t need to futz with the monitoring level (I’m monitoring on speakers at this point).
Step two: EQ
Because my goal is natural-sounding speech, I pay close attention to the tonal balance — especially low frequencies. I use high pass filters on all dialogue tracks, usually set to between 80 Hz and 100 Hz (or higher depending on the voice), to tame low frequencies caused by proximity effect or a microphone’s particular timbre. I also listen for low-mid resonances and overly-hyped brightness and reduce it where possible (something needed more and more as home recordings have become ubiquitous).
Step three: compression
Compression is usually just a few dB of reduction with a low ratio like 1.5:1 (again, a natural sound is the goal). Other compressor settings, especially attack and release, are adjusted per voice and will vary with the recording method used. This use of EQ and compression is to “undo” the effects of close-miking a voice, which is the typical approach in radio and podcast recording. I want the voices to sound more like they are talking to me from across the table as opposed to talking to me through a bunch of electronics.
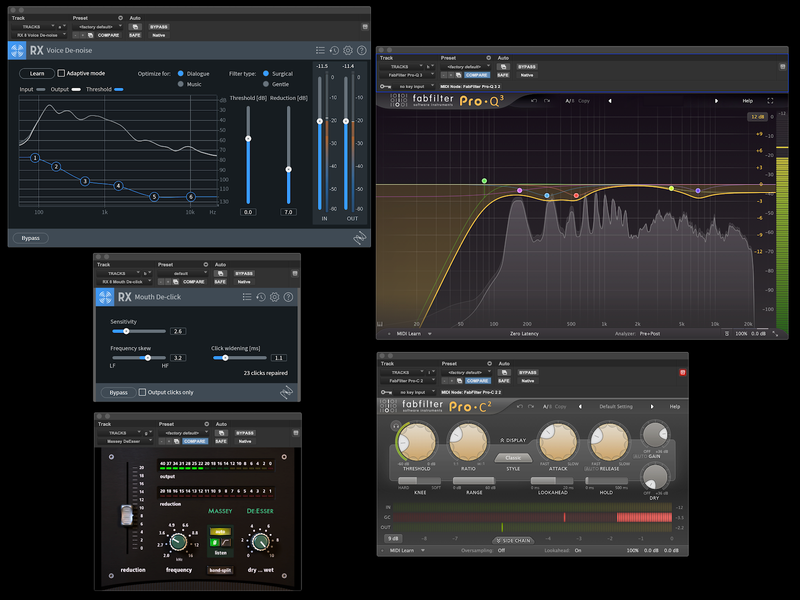
Here’s a screengrab of a common set of processing choices for a dialogue track (voice de-noise, mouth de-click, de-essing, EQ, and compression).
Step four: revisit edits and fades
Once processing is applied to each dialogue track, I’ll check the edits in headphones. Using a combination of pre-roll and keyboard shortcuts to efficiently move to each clip boundary, I’ll listen to every edit and fade and determine if it needs a tweak. Doing this after processing is applied is key, as problems may stick out (or disappear!) as a result.
While checking edits, it’s not uncommon to hear tight edits cut off room reflections, and I may need to add reverb back as a fix. Because I’m compartmentalizing, I’ll mark those edits to revisit them later (along with other common problems like mouth clicks and plosives). Resist the rabbit holes!
To keep track of notes in Pro Tools, I place clip groups on an audio track and name them appropriately. I find this method keeps the notes in sync with the content better than using markers.

Step five: write level automation
Now it is time to write level automation for each dialogue track. This is accomplished one track at a time, starting with the host or primary narration track and targeting -24 LUFS. The host track is then used as the guide for the rest of the dialogue. When the dialogue is complete, the scene sound and music will be balanced underneath (but we have some work to do before we get to that step!). This approach ensures that the dialogue remains the anchor for the entire mix.
I write level automation live with a finger on a fader. I can work quickly this way, and it prevents me from “tweaking out” too much (like I am prone to do when using a mouse). Because the level automation is live, it ensures that I hear every word of the piece and can mark problems as they appear.
Since the goal is natural-sounding dialogue, I rarely make fader moves for specific words or syllables. Instead, I mix in sentences and phrases, which allows the listener to hear emphasized words.
The dialogue bus
Once automation is written for all of the dialogue tracks, it is time to turn on the dialogue bus processing (more on why I mix with it off in a moment). One of the tools I use to achieve a natural-sounding yet consistent mix is Sound Radix’s POWAIR. I started using this soon after it came out (long before I was asked to write this post!) and it quickly became an essential tool. It is primarily known as an ingenious compressor, but I use it for the K-weighted loudness leveler on the input stage. When applied carefully, POWAIR’s loudness leveler can take a consistent dialogue mix and make it a tight dialogue mix that will cut through the din of washing dishes — while still sounding natural! Here’s how I configure POWAIR for the dialogue bus.

Download Rob Byer's Dialogue Bus preset for POWAIR
These settings assume that POWAIR is receiving well-mixed dialogue at -24 LUFS. When used in this way, the loudness leveler slightly reduces the dynamics of the dialogue without removing emphasis or becoming heavy-handed. The plug’s compressor will lightly engage, but not in a way that removes the life from the dialogue. The end result is tight dialogue that does not sound compressed!
Because POWAIR is a loudness leveler, I find it ideal to make the initial track-by-track dialogue mix with the plugin bypassed, otherwise, it will “fight” against the fader moves.
I like POWAIR, but like any other tool, it can be abused. The integration time should not be so fast or slow that it doesn’t align with the length of a typical word or two. And, if you are providing fairly consistent audio at the input, just a couple of dB on the gain range setting will create a tighter mix. If you allow POWAIR to use too much gain you will hear it pulling the content around unnaturally.
Finish the mix
Balance other audio to the dialogue
With the dialogue bus now mixed and hitting the intended target perfectly, it is time to balance scene sound and music. With the dialogue as the anchor, I now rely on my ears and constantly check balances against the dialogue, rather than the meter, even for places where scene sound or music is in the clear. At this point, if it sounds right, it is right — regardless of what a meter tells me (keeping in mind that the loudness normalization stage will apply some limiting).
Return to the notes
Next, I fix all of the individual problems (ticks, plosives, etc.) that I noted during the earlier stages of the mix. This usually involves a slightly different screen configuration, with noise reduction tools easily available. I also do this work in headphones, not with speakers. All great reasons to compartmentalize!
Last listen-through
The very last step I take is to check the entire mix in headphones, carefully listening from beginning to end, paying attention to all of the elements of the mix. This is a good chance to re-evaluate transitions, music-to-voice balances — and I often catch some additional minor things to clean up.
My process is always evolving, and the tools often change — but what’s described here has been the foundation of my method for dialogue mixing for a long time. I’m pleased with the results and I hope it will be helpful to you in your work, too. If you give this a shot, let me know how it goes. If you have tips for steps that you find particularly helpful that are not mentioned here I’d love to learn from you! One of my favorite things about working in audio is sharing ideas and techniques.
Reach out on Twitter (@RobByers1) or email.